Posts

Showing posts from 2009

How to keep your Internet connection to stop disconnecting after a few hours

This is a problem for people with mobile internet connections. People that is always on the road. Reply from 69.197.117.221: bytes=32 time=493ms TTL=51 Reply from 69.197.117.221: bytes=32 time=491ms TTL=51 Reply from 69.197.117.221: bytes=32 time=498ms TTL=51 Reply from 69.197.117.221: bytes=32 time=488ms TTL=51 Make it stay connected even if your internet connection is slow and moving from one place to another. Click the  Start Menu, key in “cmd”, press enter and use the syntax below. ping yahoo.com –t Reply from 69.197.117.221: bytes=32 time=517ms TTL=51 Reply from 69.197.117.221: bytes=32 time=546ms TTL=51 Reply from 69.197.117.221: bytes=32 time=521ms TTL=51 Reply from 69.197.117.221: bytes=32 time=524ms TTL=51 Reply from 69.197.117.221: bytes=32 time=523ms TTL=51 Reply from 69.197.117.221: bytes=3...

All folders are gone in USB flash Drives

Image
According to AVG only 3% of today’s security problems are caused by ‘traditional’ viruses and in my experience, most of them are using the older version of Windows.   Ok, many Windows users asked me several weeks ago how in the world their files are missing in just few minutes. After examining the flash disk, I found out worms are responsible for hiding the files and it self propagates through autorun.inf again. During that day I remembered the good old useful article in vista . How to Show all hidden Folders Be sure that you have scanned and cleaned all the virus in your drive first and proceed with the How to guide below. Open the command prompt as administrator Once it opens, go to your usb drive (in my case drive g )and launch the attrib command as shown below: g:                               ...

NASA STS-129 Rendezvous Pitch Maneuver

Image
                Hobaugh will maneuver Atlantis through a back flip rotation to expose the heat shield when Atlantis is about 600 feet from the station. The photos will be transmitted to mission control for checking and evaluation to determine whether the heat shield sustained any damaged and problems during launch. If your one of the NASA fans you can save the video directly . STS-129 Booster Camera Video http://anon.nasa-global.edgesuite.net/anon.nasa-global/ccvideos/sts-129_srb.asx You can click the link above but it is recommended to copy and paste the url directly in Windows Media Player by pressing CTRL+u . Enjoy!

NASA LCROSS Mission: Shooting to the Moon

Image
According to NASA the LCROSS mission was designed to search for water on the moon. The LCROSS mission is going to accomplish this by sending a rocket into the moon causing a huge blast and impact creating a crater, throwing tons of potentially water ice and vapor above the lunar surface. To get a  better idea about the project download and watch the mission overview here: http://lcross.arc.nasa.gov/audio/MissionOverview-HQversions.web.mov Youtube: NASA LCROSS IMPACT http://www.youtube.com/watch?v=mVyEOFfv_lo Tips and Tricks How To get the live feed and streaming video from NASA: Open your Windows Media Player and press CTR+u Paste the link below: http://mfile.akamai.com/18566/wmv/etouchsyst2.download.akamai.com/18355/wm.nasa-global/LCROSS/LCROSS_Lunar_Impact.asx NASA Public Channel http://playlist.yahoo.com/makeplaylist.dll?id=1369080&segment=149773 Have Fun!

Advanced: Another Way to Add Icons to Desktop

Image
Creating a shortcut icon to desktop is very easy and one of the useful invented features in Windows. Did you ever asked why some system icons has no overlay shortcut arrow icon?  e.g. Computer, Network, Recycle Bin and Internet Explorer Icon. Tweak with winbubbles ?  Maybe… Now, I’m going to share how to create icons in Desktop like those system icons that we usually see. 1. Create or Provide a reference number called GUID which is unique to identify a particular icon. Learn first how to generate a new GUID for each Icon that you’ll create. 2. In this example I’m going to use the Guid: {9e4e00f2-7abc-44b6-9853-e807cdb1dccb} 3. Find and Open Regedit.exe using the Start Menu Quick Search and navigate to the Subkeys below: HKEY_CURRENT_USER\Software\Microsoft\Windows\CurrentVersion\Explorer\Desktop\Namespace *If you can’t see the Desktop and Name space keys… just create a new subkey 4. Create a new Key inside called {9e4e00f2-7abc-44b6-9853-e...

Simple Ways to Improve/Enhance Windows Vista Performance

Image
Speed up Vista! This is the most directly and indirectly talked topic in the internet for 2 years the day after Windows Vista was launched. In this article, I’m going to give several ways to Increase your laptop and PC performance. Install Windows Vista Service Pack 1 and 2 When Windows Service Pack 1 was released, we have seen huge performance increase in File Management, Compatibility and Windows Shell Stability. Windows Vista Service Pack 2 makes it more stable and faster. I’m using the new Service pack for few weeks now and it looks good. Download SP1 and SP2 Increase your RAM For sure… Buying more RAM in Vista will help you while in Multiple Task - launching and using several apps at the same time. Fresh Installation of Windows Vista Windows was designed to operate in multiple cases or hybrid environment. So, definitely tracking those changes is extremely difficult or almost impossible to detect. If you upgrade the copy of your ...

Download Vista SP2 - New Service Pack for Windows Vista

Image
The latest service pack both for Windows Server 2008 and Windows Vista includes all the updates delivered since SP1 . Therefore, make sure that you are running the previous version of Service Pack before installing the new one.       It Supports new types of hardware and simplifies deployment for all users. Procedure SP1: Read first the Notable Changes and Reminders in SP1 , Download and Install the previous Service pack . SP2: Choose which type do you want (DVD ISO or the standalone installer) and Download the File . Simply launch the installer afterwards and follow the instructions After you successfully installed Vista SP2, you can run the Cleanup tool (compcln.exe in command prompt) to permanently install the Service Pack and save more disk Space. Important Changes that you will noticed: Stability and Performance

Quick Tip: Speed up Minimize and Maximize of Window in Windows Vista

Image
To see is to believed: For two days now, I am trying to emulate the speed of Windows 7 in Vista. One feature that can be access by anyone is increasing the speed of maximizing and minimizing a window by removing the animation feature. Simply press Windows Key + R to launch the Run Window and type rundll32.exe Shell32.dll,Control_RunDLL SysDM.cpl,,3 Alternatively, you can press Win+Pause and once the System Window opens click the “Advance system settings” located at the left side of the window. Afterwards UAC will open, just push the Continue button. In Performance Group, Click the Settings Button. Performance option window will open and in Visual Effect Tab click the “Custom:” option. Simply uncheck Animate windows when minimizing and maximizing and hit the Apply Button . That’s it. Proof: Disable the feature and open a Picture (.jpg or png) in  Pictures folder using Windows Photo Gallery. I’m sure you’ll noticed a huge difference… esp...

Clean-up your Registry using RegistryBooster 2009

Image
I would like to thank Uniblue.com for this month donation in this blogsite. It will help me maintain and create more products faster… Thank you very much! The truth is, they did not ask me to write something about their product. However, when I tried it out, I was amazed because it was very very easy to use. The product is good. It will help you automate finding problems easily. Also, the most important thing… It will let you create a backup before cleaning your registry. It’s a must to try. CLICK HERE Enjoy! :) If you want to learn more about the registry and what can you do about it. Check out my Tips: Windows Vista Tips and Secrets, Tricks, Tweaks, Unlocks and Downloads Also… Please check out my other Softwares related to Registry Booster 2009: Read Here

Getting the Computer Specs, Performance and Speed Information in Windows 7 and Vista

Image
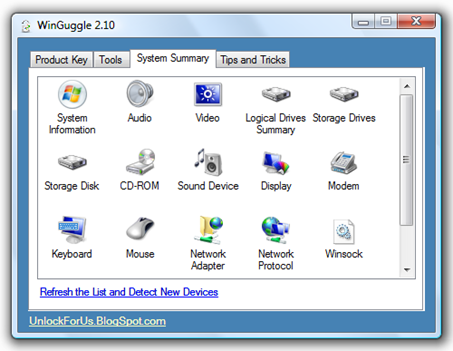
If you want to buy a new laptop, netbook or PC. There are several simple ways to check the specifications and performance if it is running in Windows Vista or 7.   Windows Experience Index score indicates the overall capability and performance of your PC or for simple explanation it is a free benchmark tool that will guide you in buying a new computer. You can access them through Performance Information and Tools Window. Speed and Performance Information Simply type “Performance info” in Start Menu Search and press the Enter Key. You can re-check the values by clicking “update my score” to prevent yourself from being trick if the wei scores was hack . You can also check in Windows 7 from my previous article – click here . What do these numbers mean? You can click the link to open the help documentation by Microsoft as shown in the picture above. Monitoring the Performance in real-time If you want to check the computers performance using t...

Standard Battery Benchmark will accelerate Innovation

AMD is proposing a simple and realistic benchmark using only two parameters: Active Time and Resting Time. For simple explanation – Best Case and Worse Case. If all the manufacturers will agree to this idea, I think it will accelerate the research and development because it will put some pressure to big companies to invest on extending the life of batteries in the future. It will start a good competition that will benefit the users and the world. Thanks Mr. David Pogue of Nytimes.com for the video. Read more: Innovation Wave – Users will become more Happy Soon

How to Remove Invalid “Open With” Menu Program Entry

Image
In Windows 7 and Vista, there is no option or easy way to clean-up any incorrect Open with Menu items. Today, I’ll give several ways to remove any wrong program from the list. Open the powerful Registry Editor by typing “regedit” in Start Menu Search               Go to the following Subkey: HKEY_CURRENT_USER\Software\Microsoft\Windows\CurrentVersion\Explorer\FileExts Instance 1: Next, find the corresponding extension. e.g. .txt Click OpenWithList MRUList data value ab means a and b will be included in the list (notepad and google chrome). If you want to remove Google Chrome. Just change the Value data of MRUList to a only. How about Visual Basic and C#? Simply navigate to .txt in HKEY_CLASSES_ROOT HKEY_CLASSES_ROOT\ .txt\OpenWithProgids simply delete the two registry entries… That’s it! You can also backup first using the E...

HideDrivesWithNoMedia

Image
This is a new registry value added in Windows 7 that will let you hide empty drives in My Computer Window. HKEY_CURRENT_USER\Software\Microsoft\Windows\CurrentVersion\Explorer\Advanced Type “regedit” in Start Menu Search, open the Registry Editor and go to the Registry key or folder above. You’ll see the dword type HideDrivesWithNoMedia is set by default to 1. It corresponds to checked option in Folder Options If unchecked, HideDrivesWithNoMedia will be set to zero. Check out more about the hidden option in my new Windows 7 Blogsite. Click here Enjoy!

How to Copy & Paste Text from CMD or Command Prompt Window

Image
This is an old tip but useful in everyday Windows Geek computing. Some of the articles in the internet uses the Title Window to copy text. My Tip will let you directly copy Text from your old DOS-like command line interpreter screen. While googling and randomly reading articles from the web (getting to sleep). I noticed the instructions to copy Text from Cmd tool. Right-Click the Title Window > Edit > Mark I’ve been using a different procedure for a very long time now. Maybe since Windows 2000 and XP. I don’t remember. Just Right-Click the screen then Choose the Mark option. That’s it! :D Simply select the Text that you want to copy by highlighting the text. No need to press Shift key and arrow keys. To copy the Text: Push the Mouse Right-Click Button . or press Ctrl+C The text has been copied to your Clipboard… You can now paste the data to any application such as notepad, wordpad or MS Office. Still works in ...

Innovation Wave – Users will become more Happy Soon

Image
This is the list of New Products recently that I think has a fair and big chance of hitting the jackpot. Windows 7   Windows 7 is the new operating system by Microsoft. The OS is fast, stable, user experience is amazing and few annoyances. The good thing in this OS is that it will run on low end PCs. For more information about Windows 7, check out the article from Wikipedia and my new blog dedicated to Windows 7 tips and tricks . Google Wave Google Wave is the new project by Google designed to unite different messaging technology into one. It is an open-source computing platform that will merge e-mail, instant messaging and social networking. Watch the Google Wave Developer Preview at Google I/O 2009. It’s really cool… Nice! For developers check out some Google Wave API samples . Project Natal It is a new way to play games: no controller is required. Personally, I think the project is possible. I have seen some small s...

Open the Hidden Shutdown Dialog Window in Windows 7 and Vista

Image
You can launch or get the old Shutdown Dialog window in Windows XP by using the Classic Start Menu. Also, you can do this in Windows Vista by changing the options. But, I guess most of us doesn’t use any more the classic Start Menu especially in Windows Vista because of the Start Menu Search feature. If you miss the old times and just want to see the old shut down dialog box. No problem! Without switching to classic Start Menu, you can still launch the Window. Works in Windows 7 too! No more classic Start Menu in Windows 7? No problem… Simple rule: Just make sure that the Desktop is in Focus and then, Press Alt+F4. That’s it!   You can click the Desktop and Press Alt+F4   You can also use the keyboard shortcut in Windows 7 and Vista: Win+D to minimize all the Window and then Press Alt-F4 . That’s it! Cool thing … The Hidden Trick in Windows XP… CTRL + SHIFT + ALT + Canc...

Free Vista Password Reset Tool – How to Create a USB Recovery Disk

Image
Prevention is better than Cure: This is one of the useful feature of Windows Vista. There is a built-in USB password reset feature that will let you backup the user account and password information. Just incase you forget your password, lose the smart card  or when your fingers was cut by accident… :D You can still accessed the account by resetting the password. Open the start menu and simply click the User Account Picture User Accounts Window will open and click the Create a password reset disk located at the left side part of the window. Forgotten Password Wizard will open and simply click the Next Button Change and Set the location of the disk Enter the current password   If the account doesn’t have a password, leave the box blank (useless junk procedure… no password!) Finished. Just like what Microsoft said, Keep it in a safe place. (secret) Easy right? Well, Most of the Geeks will launch the User Accoun...